An Apple ID is a personal account used to access various Apple services, such as the App Store, iCloud, iTunes, Apple Music, and more.
An AppleID serves as a central hub for managing your Apple-related activities and data across different Apple devices, including iPhone, iPad, Mac, and Apple Watch.
An Apple ID is primarily referred to as “Apple ID,” but there are a few other terms or contexts in which it might be described differently:
iTunes Account: Historically, when Apple ID was first introduced, it was often referred to as an “iTunes Account” because it was primarily used for purchasing music and other media from iTunes. This term is less common now but may still be used by people who remember the older branding.
iCloud Account: When referring to the use of an Apple ID specifically for iCloud services like email, storage, and backups, some people might call it an “iCloud Account.”
App Store Account: Similar to the iTunes Account, when the Apple ID is used for purchasing apps from the App Store, some might refer to it as an “App Store Account.”
Apple Account: In some contexts, especially in non-technical conversations, people might just refer to it generally as an “Apple Account.”
Apple Login: Informally, some people might refer to the credentials used to log into Apple services as their “Apple Login.”
Apple ID Email: Since the Apple ID is usually an email address, it might be referred to as “Apple ID Email” or simply “Apple Email” when discussing the email address used for the Apple ID.
These terms are all different ways to refer to the same thing: the account you use to access all Apple services.
Key Functions of an Apple ID:
Purchases and Downloads: You use your Apple ID to buy and download apps, music, movies, and books from the App Store, iTunes Store, and other Apple services.
iCloud: It allows you to sync data like photos, contacts, documents, and backups across your devices.
Apple Music and Subscriptions: You can use your Apple ID to access subscription services like Apple Music, Apple TV+, and Apple Arcade.
Device Security: It helps manage security features like Find My iPhone, Activation Lock, and two-factor authentication.
Personalization: Your Apple ID stores your personal settings, preferences, and purchase history.
An Apple ID is essential for anyone using Apple products or services, as it ties all of your Apple-related activities together under one account.
Table of Contents
Table of Contents
How do I create an Apple ID on iOS?
Creating an Apple ID on an iOS device is a straightforward process. Here’s how you can do it:
Steps to Create an Apple ID on iOS:
Open the Settings App:
On your iPhone or iPad, tap the Settings icon.
Tap on “Sign in to your iPhone”:
If you’re not already signed in with an Apple ID, you’ll see this option at the top of the Settings menu.
Tap “Don’t have an Apple ID or forgot it?”:
This option appears below the password field.
Select “Create Apple ID”:
A pop-up will appear asking if you want to create a new Apple ID. Tap on Create Apple ID.
Enter Your Information:
You’ll be asked to enter your name, date of birth, and email address. If you don’t have an email address, you can get a free iCloud email address during the setup.
Create a strong password and verify it by entering it again.
Set Up Security Questions:
Choose and answer three security questions. These will help you recover your account if you forget your password.
Agree to Terms and Conditions:
Read the Apple Terms and Conditions and tap Agree to proceed.
Verify Your Email Address:
Apple will send a verification code to the email address you provided. Enter this code on your device to verify your account.
Complete the Setup:
You may be asked to enter additional information, like a phone number for account recovery and setting up two-factor authentication.
Sign In with Your New Apple ID:
After completing the setup, you’ll be automatically signed in with your new Apple ID.
Once the process is complete, your Apple ID will be linked to your iOS device, and you can start using it to download apps, access iCloud, and more.
How do I create an Apple ID on macOS?
Creating an Apple ID on macOS is easy and can be done through the system preferences or during the initial setup of your Mac. Here’s a step-by-step guide:
Steps to Create an Apple ID on macOS:
Open System Settings:
Click on the Apple menu in the top-left corner of your screen.
Select System Settings (or System Preferences on older macOS versions).
Click on “Sign in with your Apple ID”:
If you’re not already signed in, you’ll see this option at the top of the System Settings window.
In older macOS versions, this might appear as “Sign in to iCloud.”
Click “Create Apple ID”:
A new window will appear asking for your Apple ID. Below the fields, click on Create Apple ID.
Enter Your Information:
You’ll be asked to provide your first and last name, date of birth, and an email address. You can use an existing email address or get a free iCloud email during the setup.
Create a password and confirm it by entering it again.
Set Up Security Questions:
Choose and answer three security questions to help secure your account. These will be used for account recovery.
Agree to Terms and Conditions:
Review Apple’s Terms and Conditions and click Agree to proceed.
Verify Your Email Address:
Apple will send a verification code to the email address you provided. Enter this code on your Mac to verify your account.
Complete the Setup:
You may be prompted to enter additional details, such as a phone number for account recovery and enabling two-factor authentication.
Sign In with Your New Apple ID:
Once your Apple ID is created and verified, you’ll be signed in automatically on your Mac.
Your new Apple ID is now ready to use on macOS. You can use it to access the App Store, iCloud, Apple Music, and other Apple services.
How do I create an Apple ID on the internet?
Creating an Apple ID on the internet is simple and can be done through Apple’s official website. Here’s how to do it:
On the Apple ID page, you’ll see an option that says Create Your Apple ID. Click on this to begin the process.
Enter Your Personal Information:
Fill out the form with your first and last name, country or region, birthday, and a valid email address. This email address will become your Apple ID.
Create a strong password that meets Apple’s requirements and enter it twice to confirm.
Select your country and fill in your phone number. You can choose to verify your phone number via a text message or phone call.
Set Up Security Questions:
Choose and answer three security questions. These are used for account recovery if you forget your password or need to verify your identity.
Enter the CAPTCHA:
To prove that you’re not a robot, enter the CAPTCHA code shown on the screen.
Agree to Terms and Conditions:
Review Apple’s Terms and Conditions and Privacy Policy. Check the box to agree to these terms, then click Continue.
Verify Your Email Address:
Apple will send a verification email to the address you provided. Open the email and click on the verification link or enter the verification code provided in the email on the Apple ID website.
Sign In with Your New Apple ID:
After verifying your email address, your Apple ID will be created. You can now use it to sign in to Apple services.
Your Apple ID is now ready to use with all Apple services, including iCloud, the App Store, Apple Music, and more. You can use this ID to sign in on any Apple device or via a web browser.
I don’t have an email address can I still setup an Apple ID?
Yes, you can still set up an Apple ID without an existing email address by creating a new iCloud email during the Apple ID setup process. This iCloud email will become your Apple ID. Here’s how you can do it:
Setting Up an Apple ID with an iCloud Email on iOS or macOS:
On iOS (iPhone or iPad):
Choose “Get a free iCloud email address”:
When prompted for an email, select the option to Get a free iCloud email address.
Follow the remaining prompts to set up security questions, agree to terms and conditions, and verify your phone number.
On macOS:
Select “Get a free iCloud email address”:
When prompted for an email address, choose the option to Get a free iCloud email address.
Create Your iCloud Email:
Enter your desired iCloud email address and click Next.
Create and confirm your password.
Complete the Setup:
Continue through the setup process to finish creating your Apple ID.
Notes:
Your new iCloud email address will be your Apple ID.
This iCloud email can be used for all Apple services and can also be used as a regular email address.
This process allows you to create an Apple ID even if you don’t have an existing email address, using the free iCloud email service.
Do I have to have a credit card attached to my Apple ID?
No, you do not need to have a credit card attached to your Apple ID. While Apple may prompt you to add a payment method when you create an Apple ID or when you make your first purchase, you can choose to skip this step or use alternative payment methods. Here’s how you can set up an Apple ID without a credit card or remove a payment method if one is already attached:
Select “None” for Payment Method:
When you reach the payment method screen, select None. This allows you to create the Apple ID without attaching a credit card.
How many Apple IDs can I have?
You can technically create and use as many Apple IDs as you want, however Apple may limit how many Apple IDs your phone number can be attached to for verification. Apple advises using a single Apple ID for all your Apple services and purchases to keep everything in sync across your devices.
There isn’t a specific limit imposed by Apple on how many Apple IDs you can create, but managing multiple IDs can become complicated, especially with app purchases, subscriptions, and data syncing.
Can I merge Apple IDs?
No, Apple does not currently allow users to merge multiple Apple IDs. If you have more than one Apple ID, you can’t combine the data or purchases associated with those IDs into a single account.
However, you can use the Family Sharing feature to share purchases, subscriptions, and certain content among different Apple IDs. This doesn’t merge the IDs but allows you to access purchases made with different Apple IDs within the same family group.
How does Apple ID Family Sharing work and how do I set it up?
Apple’s Family Sharing allows you to share Apple services and purchases with up to six family members using their own Apple IDs. Here’s how it works and how to set it up:
What You Can Share with Family Sharing:
App Store Purchases: Share apps, music, movies, TV shows, and books purchased from Apple.
Apple Subscriptions: Share Apple Music, Apple TV+, Apple Arcade, Apple News+, and iCloud storage plans.
Apple Card and Apple Cash: Share financial tools with family members (in the U.S.).
Location Sharing: See where your family members are on a map.
Screen Time: Set limits and monitor your children’s device usage.
Photo Album: Automatically share photos and videos with a family album.
Calendars and Reminders: Share calendars and reminders among family members.
Find My: Locate missing devices belonging to family members.
Setting Up Family Sharing:
On Your iPhone, iPad, or iPod Touch:
Go to Settings.
Tap your name (at the top of the screen).
Tap Family Sharing.
Tap Set Up Your Family and follow the onscreen instructions to invite family members.
On Your Mac:
Choose Apple menu () > System Settings.
Click your name (or Family Sharing if using an older version of macOS).
Click Set Up Family and follow the onscreen instructions.
Inviting Family Members:
Once Family Sharing is set up, you can invite family members to join.
Enter their Apple ID email addresses, and they’ll receive an invitation to join.
Managing Family Sharing:
Family Organizer: The person who sets up Family Sharing is the Family Organizer, responsible for approving purchases and sharing subscriptions.
Payment Method: The Family Organizer’s payment method is used for purchases made by family members. However, you can control who can make purchases.
Adding/Removing Members: The Family Organizer can add or remove family members, manage shared subscriptions, and control what is shared.
Important Notes:
Content Restrictions: You can set age-based content restrictions for children.
Personal Data: Family members maintain separate Apple IDs, so personal data like messages, photos, and documents stay private.
Purchase Sharing: Family members can see each other’s purchases and re-download shared content.
By using Family Sharing, each member can still have their own Apple ID while enjoying shared benefits and access to various Apple services.
Apple’s Family Sharing itself is free to set up and use. There’s no additional cost to enable Family Sharing or to invite family members to join.
However, there are some things to keep in mind:
Shared Purchases: When family members buy apps, music, movies, or other content from Apple, the cost is charged to the Family Organizer’s payment method. So, while Family Sharing is free, you are responsible for purchases made by others in the group.
Subscription Sharing: While Family Sharing is free, the subscriptions you choose to share (like Apple Music, Apple TV+, iCloud storage, etc.) are paid services. If you share these subscriptions, everyone in the family can access them at no additional cost, but the Family Organizer will be billed for the subscriptions.
iCloud Storage: If you share an iCloud storage plan, the cost of the plan is billed to the Family Organizer, but there’s no extra fee for sharing it with family members.
In summary, Family Sharing itself is free, but the services and content shared within the family group may have associated costs depending on what you choose to purchase or subscribe to.
Can I delete or deactivate an Apple ID?
Yes, you can delete or deactivate your Apple ID, but both actions have significant consequences, so they should be done with caution.
1. Deleting Your Apple ID:
When you delete your Apple ID, you permanently lose access to all data and services associated with it, including:
Purchased apps, music, movies, and books.
Subscriptions to services like Apple Music, Apple TV+, iCloud, etc.
Your iCloud data (photos, documents, backups, etc.).
Messages and iMessage history.
Apple services like iMessage, FaceTime, and Find My.
2. Deactivating Your Apple ID:
If you’re not ready to permanently delete your account but want to stop using it temporarily, you can deactivate it. Deactivation suspends the account and access to Apple services but allows you to reactivate it later.
Is an Apple ID secure, is my information at risk?
Apple IDs are generally secure, but like any digital account, their security depends on how you manage them. Apple has implemented several robust security features to protect your account and personal information. However, there are always risks associated with online accounts, and it’s important to be proactive about protecting your Apple ID. Here’s what you need to know:
Security Features of Apple IDs:
Two-Factor Authentication (2FA):
Apple offers 2FA as an additional layer of security. When enabled, 2FA requires you to enter a verification code sent to a trusted device or phone number along with your password when signing in.
This makes it much harder for someone to access your account, even if they know your password.
Strong Password Requirements:
Apple requires you to create a strong password for your Apple ID, which must be at least eight characters long and include a combination of uppercase and lowercase letters, numbers, and symbols.
Encrypted Data:
Apple encrypts data like iMessages, FaceTime calls, Health data, and passwords stored in iCloud, ensuring that it remains private and secure. Even Apple cannot access this data without your passcode or password.
Security Alerts:
Apple sends email notifications and alerts to your devices if there’s any suspicious activity, such as a new device logging into your account or changes made to your account settings.
Find My Service:
If your Apple device is lost or stolen, you can use the Find My service to locate it, lock it, or remotely erase its data to protect your personal information.
Risks and How to Protect Your Apple ID:
Phishing Attacks:
Scammers may try to trick you into giving away your Apple ID and password through fake emails, texts, or websites that look like they’re from Apple.
Always be cautious of unsolicited messages asking for your Apple ID credentials and double-check the sender’s address. Apple will never ask for your password via email.
Weak Passwords:
If your Apple ID password is weak or reused across multiple accounts, it’s easier for hackers to gain access.
Use a strong, unique password for your Apple ID, and consider using a password manager to keep track of it.
Device Security:
If someone gains physical access to your device and it’s not protected by a passcode or biometric security (Face ID/Touch ID), they might access your Apple ID.
Always enable passcode or biometric protection on your devices and avoid leaving them unattended.
Public Wi-Fi Risks:
Logging into your Apple ID on unsecured public Wi-Fi networks can expose you to risks of man-in-the-middle attacks.
Avoid logging into sensitive accounts on public Wi-Fi, or use a VPN for added security.
What You Can Do:
Enable Two-Factor Authentication if you haven’t already. This is one of the best ways to secure your Apple ID.
Use a strong and unique password for your Apple ID and change it regularly.
Be cautious of phishing attempts and only enter your Apple ID credentials on trusted Apple devices or websites.
Monitor your account activity regularly for any suspicious logins or changes.
Keep your devices updated with the latest software to ensure you have the most recent security patches.
While Apple IDs are secure and protected by multiple layers of security, your information can still be at risk if you don’t take proper precautions. By using Apple’s security features and being vigilant, you can significantly reduce the risk of unauthorized access to your Apple ID.
What if I forget my Apple ID password?
If you forget your Apple ID password, you can easily reset it using one of the methods below:
1. Reset on an Apple Device:
On an iPhone, iPad, or iPod Touch:
Go to Settings and tap on your name at the top of the screen.
Tap Password & Security.
Tap Change Password.
Enter your device passcode, then follow the on-screen instructions to reset your password.
On a Mac:
Go to the Apple menu () > System Settings > Your Name > Password & Security.
Click Change Password.
Enter your Mac’s administrator password, then follow the on-screen instructions to reset your Apple ID password.
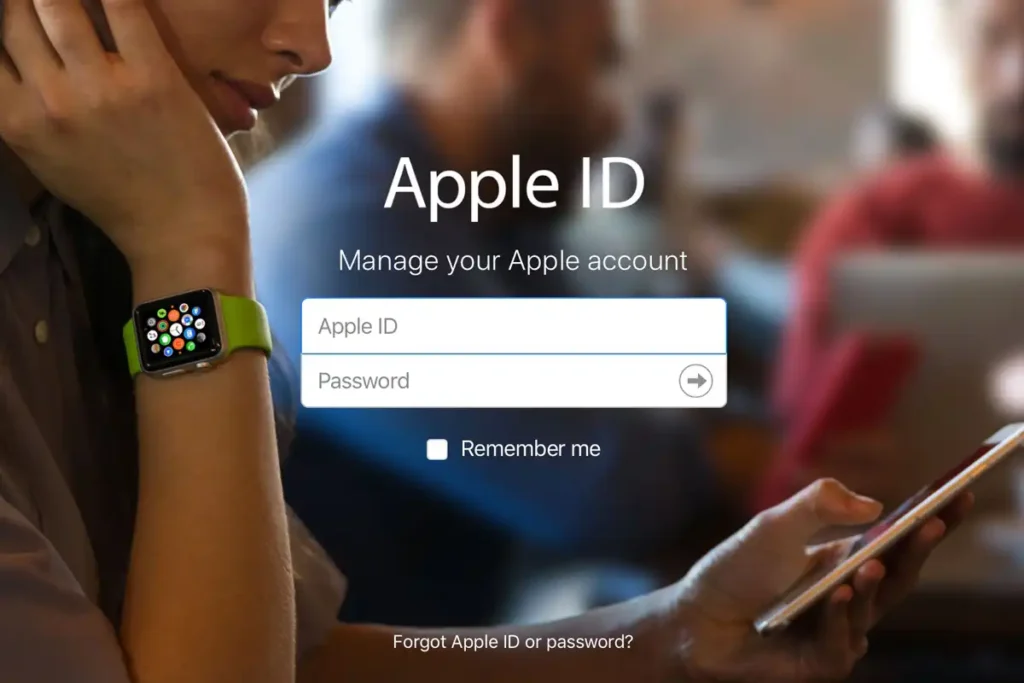
Click “Forgot Apple ID or password?” under the sign-in fields.
Enter your Apple ID email address.
Choose the option to reset your password.
You may be asked to answer security questions, receive an email, or use two-factor authentication to complete the reset process.
3. Use the Apple Support App:
If you have another Apple device, download the Apple Support app from the App Store.
Open the app and go to the “Get Support” tab.
Select Apple ID and then Forgot Apple ID Password.
Follow the on-screen instructions to reset your password.
4. Use Recovery Mode (If Necessary):
If you’re unable to reset your password using the above methods, you might need to use Recovery Mode, particularly if you’ve enabled two-factor authentication. Here’s how:
Go to Settings on your Apple device.
Tap Sign in to your [device].
Tap “Forgot Apple ID or password?”.
Follow the on-screen instructions to initiate account recovery.
During this process, Apple will send a notification to your trusted devices or require you to confirm your phone number. Account recovery might take a few days, depending on your recovery information.
5. If You Can’t Access Any Trusted Devices or Phone Numbers:
If you’ve lost access to all your trusted devices and phone numbers, you can still reset your password, but it may take longer:
Apple may ask for additional verification information to ensure you are the account owner.
6. Reset with your Family Organizer if you have Family Sharing:
if you’re part of an Apple Family Sharing group, a family member who is designated as the Family Organizer or Parent/Guardian can help you reset your Apple ID password. This feature is particularly helpful for children or less tech-savvy family members who may have trouble resetting their passwords on their own.
How a Family Member Can Help Reset Your Password:
Open Settings on Their Device:
The Family Organizer or Parent/Guardian should open the Settings app on their iPhone, iPad, or iPod Touch.
Tap Their Name:
Tap their name at the top of the screen to access Family Sharing settings.
Select Family Sharing:
Scroll down and tap Family Sharing.
Tap on Your Name:
In the list of family members, they should tap your name (the person who needs to reset their password).
Tap “Help [Your Name]”:
They’ll see an option to help you reset your password. Tap on it.
Follow the On-Screen Instructions:
The family member will follow the on-screen instructions to guide you through the process of resetting your Apple ID password.
What You Need to Know:
Two-Factor Authentication (2FA): If you have 2FA enabled on your Apple ID, you might need to confirm your identity using one of your trusted devices or phone numbers during the password reset process.
Privacy: The family member helping you will not see your current password. They’re simply guiding you through the steps to reset it.
Account Recovery Key: If you’ve set up a recovery key for your Apple ID, you’ll need to use that key to reset your password. In this case, the family member might not be able to help directly if the key is lost or forgotten.
Preventing Future Issues:
Enable Two-Factor Authentication: This not only enhances security but also simplifies the password recovery process.
Keep Your Recovery Information Updated: Make sure your phone number and trusted devices are current.
Use a Password Manager: To store your Apple ID password securely, consider using a trusted password manager.
Setup an Apple ID Recovery Key: Setting up an Apple ID recovery key adds an extra layer of security to your account. It allows you to recover access to your Apple ID if you ever forget your password or get locked out. However, it also means that you are solely responsible for keeping the recovery key safe—if you lose it and can’t access your devices, you might be permanently locked out of your account.
Steps to Set Up a Recovery Key on Your iPhone, iPad, or iPod Touch:
Open Settings: Go to your Settings app.
Tap Your Name: This is at the top of the screen.
Select Password & Security: Tap Password & Security in the options.
Turn On Recovery Key:
Scroll down and tap Recovery Key.
Toggle the Recovery Key switch to the on position.
You may be asked to enter your device passcode to proceed.
Generate a Recovery Key:
Tap Use Recovery Key.
A 28-character recovery key will be generated. Write this down and store it in a safe place.
Confirm the Recovery Key:
Apple will ask you to enter the recovery key to confirm that you’ve saved it correctly.
Enter the key exactly as it appears, including any dashes.
Keep Your Recovery Key Safe:
Make sure you store the recovery key in a secure location, such as a password manager, a secure note, or a physical location (like a safe).
If you lose your recovery key and can’t access your devices, Apple cannot help you regain access to your account.
Steps to Set Up a Recovery Key on Your Mac:
Go to System Settings: Click on the Apple menu () and select System Settings.
Click on Your Name: In the left sidebar, click your name to access your Apple ID settings.
Select Password & Security: Click on Password & Security.
Turn On Recovery Key:
Scroll down and click Recovery Key.
Click the toggle to turn on the Recovery Key option.
Generate and Save the Recovery Key:
Click Use Recovery Key to generate the key.
Write down the 28-character recovery key and store it securely.
Confirm the key by entering it again to ensure you’ve saved it correctly.
Store the Key Securely:
As with the iPhone method, ensure your recovery key is stored somewhere safe where only you can access it.
Responsibility: Remember, you are entirely responsible for keeping the recovery key safe. If you lose it and cannot access your trusted devices, you may lose access to your Apple ID permanently.
Updating the Recovery Key: If you believe your recovery key has been compromised, you can generate a new one by following the same steps. The old key will be invalidated once you create a new one.
Backup Your Key: Consider having multiple secure copies of your recovery key (e.g., in a password manager and a physical safe).
Using a recovery key strengthens your account security but also requires careful management. Make sure you understand the risks and responsibilities before enabling this feature.
If you follow these steps, you should be able to regain access to your Apple ID even if you forget your password.