Using a second monitor with your Mac can optimize productivity and workflow.
Using a second monitor with a Mac offers a multitude of advantages that enhance productivity, convenience, and overall computing experience. The extended screen real estate allows users to efficiently multitask and seamlessly manage multiple applications simultaneously. This is particularly advantageous for professionals working with complex tasks such as video editing, graphic design, coding, and data analysis, as it enables them to spread out their workspace and streamline their workflow.
Additionally, a second monitor greatly improves content consumption by providing a larger canvas for watching videos, browsing the web, or reading documents, reducing the need for constant scrolling and zooming. The extended display also promotes better organization and file management, as users can keep reference materials or supplementary documents on one screen while focusing on their main work on the other.
Collaboration becomes more efficient with a second monitor, as team members can share information and ideas during presentations or meetings without disrupting their main tasks. Drag-and-drop functionality between screens simplifies data transfer, further streamlining teamwork and communication.
Moreover, a second monitor enhances creativity by allowing artists and designers to view their work on one screen while accessing tools and references on the other. This setup minimizes distractions and maximizes creative flow, leading to more polished and refined output.
Overall, integrating a second monitor with a Mac optimizes efficiency, organization, and collaboration, transforming the computing experience into a seamless and productive endeavor.
Requirements
Mac
Monitor, TV or supported iPad (see below)
Video Adapter (Needed if Mac model and monitor don’t have the same connector)
Video Cable (Will vary depending on connection)
How do I use a second monitor with my Mac?
To connect a second monitor to your Mac, follow these steps:
Check Compatibility: Ensure that your Mac model supports multiple displays. Most modern Macs offer this feature, but it’s always a good idea to verify.
Select the Right Cable or Adapter: Depending on the ports available on your Mac and the monitor, you might need a specific cable or adapter. Common options include HDMI, DisplayPort, USB-C, and Thunderbolt. Make sure to choose the appropriate cable or adapter that suits both your Mac and the monitor.
Connect the Monitor: Plug one end of the cable into your Mac’s designated display port and the other end into the corresponding port on the monitor.
Power On the Monitor: Turn on the second monitor and make sure it’s set to the correct input source.
Configure Display Settings:
macOS Catalina and later: Go to “System Preferences” > “Displays.” In the “Arrangement” tab, you can arrange the position of the displays (drag the screens to arrange them as you prefer) and set resolution settings.
macOS Mojave and earlier: Go to “System Preferences” > “Displays.” In the “Arrangement” tab, you can enable “Mirror Displays” to duplicate the screen or adjust the arrangement by dragging the display icons.
Adjust Resolution and Orientation (if necessary): You can adjust the resolution and orientation of the second monitor to match your preferences. This can be done within the “Displays” settings.
Extend Your Desktop: By default, macOS will likely extend your desktop onto the second monitor. This means you can drag windows between the two screens to increase your workspace.
Arrange Displays: If the second monitor isn’t positioned correctly, you can rearrange them in the “Arrangement” tab of the “Displays” settings. This ensures your mouse moves naturally between screens.
Use Mission Control: macOS’s Mission Control feature lets you manage your open windows and applications across multiple displays. Swipe up on your trackpad or press the Mission Control key to activate it.
Customize Your Setup: Explore the various customization options in macOS to make the most of your dual-monitor setup. You can set the primary display, adjust the dock’s position, and more.
Adjust Brightness and Settings: Some monitors may require separate adjustments for brightness, contrast, and other settings. These adjustments can usually be made directly on the monitor.
Disconnecting: When you’re done using the second monitor, you can disconnect it by unplugging the cable or adapter. macOS will automatically adjust to using just the built-in display.
Remember, the exact steps might vary slightly depending on your Mac model, macOS version, and the type of monitor you’re using. Always refer to the user manuals for your Mac and monitor for specific instructions.
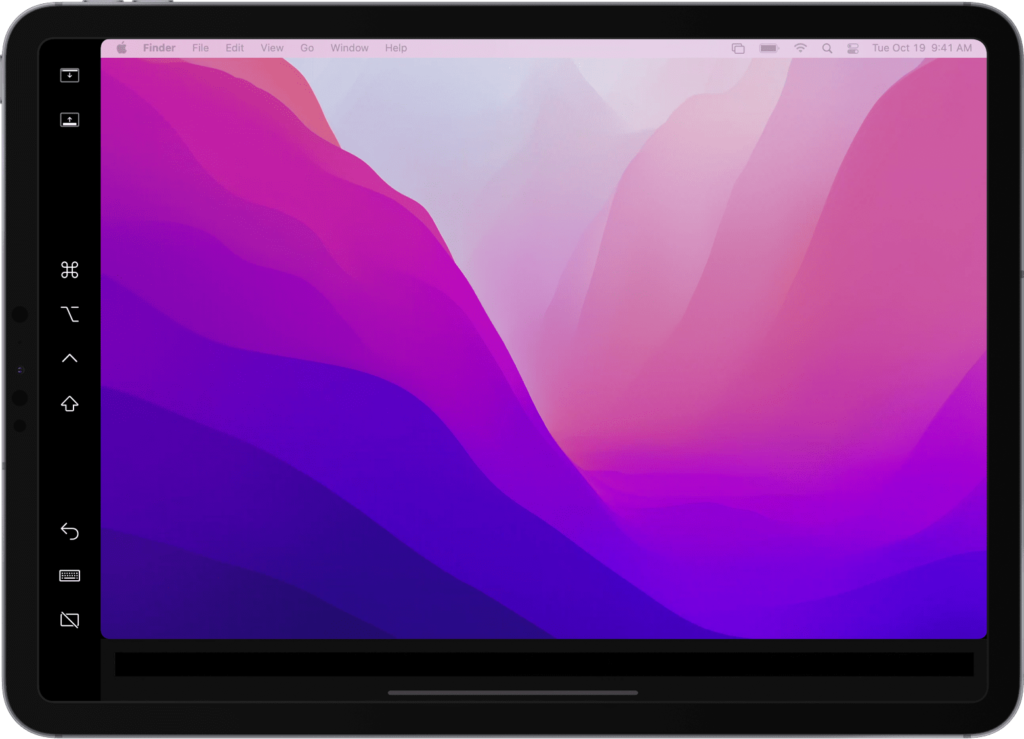
How do I use My iPad as a second monitor for my Mac?
Using Sidecar to connect your iPad to your Mac as a secondary display is a convenient way to expand your workspace and improve productivity. Here’s how you can set up and use Sidecar:
Requirements:
Compatibility:
macOS Catalina or later
MacBook Pro introduced in 2016 or later
MacBook introduced in 2016 or later
MacBook Air introduced in 2018 or later
iMac introduced in 2017 or later, or iMac (Retina 5K, 27-inch, Late 2015)
iMac Pro
Mac mini introduced in 2018 or later
Mac Pro introduced in 2019 or later
Mac Studio introduced in 2022 or later
Make sure your Mac is using the latest version of macOS.
iPadOS 13 or later
iPad Pro (all models)
iPad (6th generation) or later
iPad mini (5th generation) or later
iPad Air (3rd generation) or later
Proximity and Connectivity: Ensure your Mac and iPad are within Bluetooth and Wi-Fi range of each other.
To use Sidecar wirelessly, both devices must be within 10 meters (30 feet) of each other
Setting Up Sidecar:
Connect and Pair:
Make sure your Mac and iPad are signed in to the same Apple ID and connected to the same Wi-Fi network.
In the Sidecar preferences, you can choose whether to show the Sidebar on the left or right of your iPad screen, enable or disable the double-tap gesture on the Apple Pencil, and more.
Using Sidecar:
Extend Display or Mirror: After connecting, you can choose to extend your Mac display to the iPad, effectively giving you more screen real estate, or you can mirror your Mac’s display on the iPad.
Touch Interaction: You can use your Apple Pencil or your finger on the iPad screen to interact with macOS and control your Mac just like you would with a regular touch-enabled device.
Drag and Drop: You can drag and drop content between your Mac and iPad screens. This is particularly useful for moving files, images, and other elements.
Apple Pencil Integration: If you have an Apple Pencil, you can use it for precise interactions and drawing directly on the iPad screen.
Touch Bar: If your Mac has a Touch Bar, you can display a virtual Touch Bar on your iPad screen while using Sidecar.
Sidebar Access: The Sidebar provides quick access to various controls, including modifier keys, undo, redo, screenshot, and more. You can customize this Sidebar to include the tools you use most frequently.
Disconnecting Sidecar:
To disconnect Sidecar, you can either click the “Disconnect” button in the Sidebar on your iPad or go to the Sidecar preferences on your Mac and click the “Disconnect” button next to your iPad.
Remember that Sidecar provides a seamless way to use your iPad as an extended display or mirrored screen for your Mac. It’s especially beneficial for tasks that involve graphics, drawing, multitasking, and more. Experiment with different interactions and features to make the most of your Sidecar experience. Sidecar does not support Managed Apple IDs.
What options do I have when using a second monitor with my Mac?
Monitor mirroring and monitor spanning are two different display setups that you can use when connecting an external monitor to your computer, such as a Mac. Each setup serves a distinct purpose and offers unique benefits.
Monitor Mirroring:
In a mirrored display setup, both your computer’s primary screen and the external monitor show the exact same content simultaneously. This means that whatever is displayed on your computer’s main screen is duplicated on the external monitor. Monitor mirroring is often used for presentations, demonstrations, or situations where you want the same content to be visible to a larger audience.
Advantages of Monitor Mirroring:
Easy Presentation: It’s ideal for situations where you want to share your screen with others, such as giving a presentation or showing content to a group.
Consistency: Since both screens show the same content, there’s no risk of accidentally displaying different information on the external monitor.
Simplicity: Setting up monitor mirroring is straightforward and doesn’t require much configuration.
Monitor Spanning (Extended Display):
In an extended display or spanning setup, your computer’s desktop is extended across both the main screen and the external monitor. This allows you to have separate applications, windows, and content on each screen, effectively increasing your workspace. You can drag windows between the two screens, giving you more room to work and multitask.
Advantages of Monitor Spanning:
Enhanced Productivity: With more screen real estate, you can work on multiple tasks simultaneously, making you more productive and organized.
Multitasking: Spanning is great for tasks like coding, graphic design, video editing, or any scenario where you need to view multiple applications side by side.
Reference Materials: You can keep reference documents or applications open on one screen while working on the other, reducing the need for constant switching.
Creativity and Flexibility: Artists and designers can use one screen for their creative work and the other for tools and references, fostering a smoother creative workflow.
In summary, monitor mirroring duplicates the same content on both screens and is useful for presentations and sharing information with others, while monitor spanning extends your desktop across both screens, providing a larger workspace and enhancing multitasking capabilities. The choice between mirroring and spanning depends on your specific needs and the tasks you intend to accomplish.