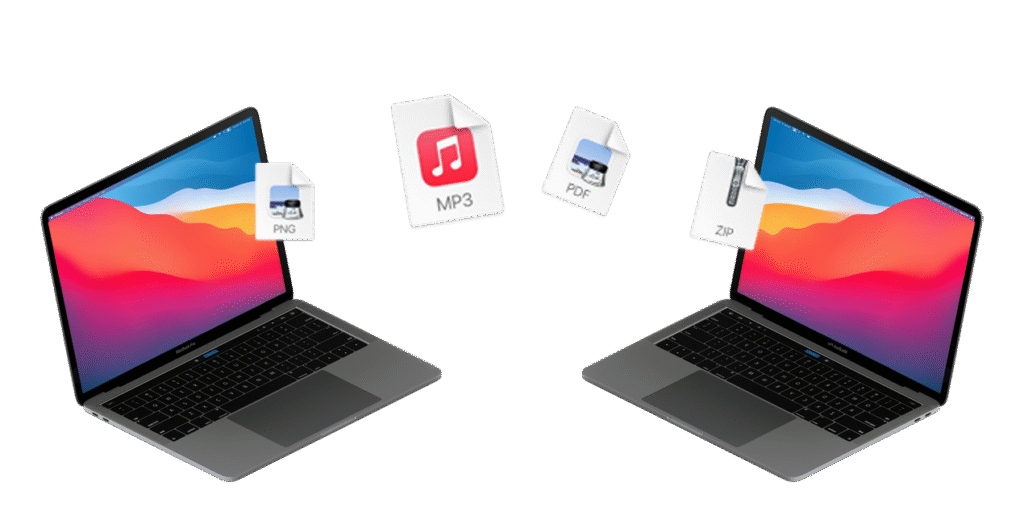
Migrating data from one computer to another means transferring a user’s digital environment from an old system to a new one in a way that maintains continuity. This process goes beyond simply copying files; it typically includes moving personal documents, photos, and media, as well as user accounts, application data, settings, and preferences. The objective is to ensure that the new computer reflects the same working state as the previous one, allowing the user to resume work with minimal interruption.
Data migration can be performed in several ways, such as direct computer-to-computer transfer, using an external storage device, through cloud-based services, or with built-in operating system tools like Apple Migration Assistant or Windows migration utilities. Regardless of the method used, successful migration ensures data integrity, proper organization, and compatibility on the new system, making the transition seamless rather than disruptive.
When migrating from one Mac to another, a wide range of data and system elements can be transferred to recreate the user’s working environment on the new machine. This typically includes user files such as documents, photos, music, videos, desktop items, and downloads, as well as complete user accounts with associated home folders, passwords, and keychain data. Mail accounts, messages, calendars, contacts, browser profiles, and many system and application preferences can also be migrated, allowing the new Mac to feel familiar immediately.
In addition, most applications installed on the old Mac can be migrated, along with their supporting files and settings, provided they are compatible with the version of macOS and the hardware architecture of the new Mac. Network settings, printer configurations, and certain accessibility and system preferences are often included as well. Items that generally do not migrate include the operating system itself, incompatible or outdated software, and low-level system extensions that are no longer supported. Overall, Mac-to-Mac migration is designed to preserve usability and continuity while adapting the data to the capabilities and requirements of the newer system.
Yes, a Windows computer can be migrated to a Mac, but the process is more limited and selective than a Mac-to-Mac migration. Apple provides Windows Migration Assistant, which is designed to move user data rather than the full operating environment. The focus is on transferring personal information and commonly used content, not Windows itself or Windows applications.
From a Windows PC to a Mac, you can typically migrate user files such as documents, photos, videos, music, and items from the desktop and user folders. Email data from supported mail clients, contacts, calendars, and some browser data—such as bookmarks and homepages—can also be transferred. User account information can be brought over to create a corresponding macOS user account, preserving folder structure and basic identity continuity.
What cannot be migrated includes Windows applications, system settings, drivers, registry data, and any software that depends on the Windows operating system. These applications must be replaced with macOS equivalents or reinstalled using native Mac versions. In short, migrating from Windows to Mac allows you to carry over your data and personal information, but not the Windows environment itself; the transition is about preserving content, not replicating the platform.
Yes, data from other operating systems—such as ChromeOS, Android, Linux, and Unix-based systems—can be migrated to a Mac, although the process is generally manual or semi-automated rather than fully integrated like Mac-to-Mac migration. The emphasis is on transferring user data, not the operating system or applications themselves.
From these systems, files such as documents, photos, videos, music, and other user-created content can be transferred easily using external storage, network shares, or cloud services. Standard data formats are the most portable and migrate cleanly to macOS. In many cases, browser data such as bookmarks, saved passwords (via browser sync accounts), and history can also be carried over by signing into the same browser on the Mac.
Additional transferable data may include email (via IMAP accounts), contacts and calendars (through cloud services like Google or CardDAV), and some application data if macOS-compatible versions of the software exist. What cannot be migrated are the operating systems themselves, system-level settings, drivers, and applications that are not available for macOS. Overall, migration from these platforms to a Mac is best understood as a data portability process, preserving personal and work content while adapting to a new operating environment rather than duplicating the original system.
To migrate from one Mac to another over Wi-Fi, Apple provides Migration Assistant, which is built into macOS and designed specifically for this purpose. On the new Mac, open Migration Assistant (Applications → Utilities) and choose to transfer data from another Mac. On the old Mac, open Migration Assistant as well and select the option to transfer data to another Mac. Both Macs must be on the same Wi-Fi network and powered on. Once the two computers discover each other, a security code appears on both screens to confirm the connection. After verification, you can choose what to migrate—user accounts, applications, files, and system settings—and the transfer begins.
While Wi-Fi migration is convenient, it comes with important caveats. Transfer speed is highly dependent on Wi-Fi quality; large migrations can take many hours and are susceptible to interruptions from network instability or sleep settings. Any pause, signal drop, or power issue can cause the migration to fail or require restarting. In addition, incompatible or outdated applications—especially older Intel-only software moving to Apple silicon Macs—may not migrate correctly or may not run after transfer. File corruption, though uncommon, is more likely over wireless connections than wired ones, particularly with very large datasets.
For best results, both Macs should be fully updated, plugged into power, and configured to prevent sleep during migration. If speed, reliability, or data volume is a concern, Apple generally recommends using a wired connection (Thunderbolt or Ethernet,) instead of Wi-Fi. Wi-Fi migration works well for modest amounts of data and casual setups, but it is not the most robust method for large or mission-critical transfers.
To migrate from one Mac to another over Ethernet, you again use Migration Assistant, but with a wired network connection to improve speed and reliability. Connect both Macs using Ethernet—either through a shared router/switch or directly with an Ethernet cable (modern Macs support auto-MDI/X, so a special crossover cable is not required). Once connected, ensure both Macs are powered on, unlocked, and on the same network. On the new Mac, open Migration Assistant (Applications → Utilities) and choose to transfer data from another Mac. On the old Mac, open Migration Assistant and select the option to transfer data to another Mac. The two Macs will discover each other, display a security code for confirmation, and then allow you to select which users, applications, files, and settings to migrate before starting the transfer.
Ethernet migration is significantly faster and more stable than Wi-Fi, but there are still caveats to consider. Transfer speed is limited by the slowest Ethernet interface involved (for example, 1 GbE versus 10 GbE), as well as the performance of the source Mac’s storage. Application compatibility remains an issue: older or unsupported software—especially legacy Intel apps, kernel extensions, or outdated drivers—may not function properly on the destination Mac after migration. Network configurations, VPN profiles, and some security-related settings may also need to be re-entered manually.
To minimize issues, both Macs should be updated to compatible versions of macOS, connected to power, and configured to prevent sleep during the transfer. Although Ethernet is a strong balance between convenience and reliability, it is still slower than direct Thunderbolt-based migration for very large datasets. For most users, however, Ethernet provides a dependable, interruption-resistant method that avoids the common pitfalls of wireless migration while remaining easy to set up.
To migrate from one Mac to another over Thunderbolt, you use Migration Assistant with a direct Thunderbolt connection, which is the fastest and most reliable migration method Apple offers. Begin by connecting the two Macs with an appropriate Thunderbolt cable—Thunderbolt 3 or 4 uses USB-C connectors, while older Macs may require Thunderbolt 2 cables and, if mixing generations, a Thunderbolt 3-to-Thunderbolt 2 adapter. Once connected, power on both Macs and plug them into AC power. On the new Mac, open Migration Assistant (Applications → Utilities) and choose to transfer data from another Mac. On the old Mac, open Migration Assistant and select the option to transfer data to another Mac. The Macs will detect each other over the Thunderbolt link, display a verification code, and then allow you to select which users, applications, files, and settings to migrate.
Thunderbolt migration offers extremely high throughput and low latency, but there are still caveats. Cable and adapter compatibility is critical; using USB-C charging cables instead of certified Thunderbolt cables will prevent detection entirely. macOS version compatibility also matters—very old systems may not migrate cleanly to much newer macOS releases without application or preference issues. As with other migration methods, incompatible or deprecated software (especially legacy Intel apps, kernel extensions, or old system utilities) may not function on the destination Mac after transfer.
Additionally, the migration speed is ultimately constrained by the source Mac’s storage performance and the amount of data selected, so even Thunderbolt can take time for very large user accounts. Security settings, some network configurations, and certain background services may require manual reconfiguration after migration. Despite these considerations, Thunderbolt is generally the preferred method for large, mission-critical migrations, offering the highest reliability and the lowest risk of interruption compared to Wi-Fi or Ethernet.
If one or both Macs lack Thunderbolt or do not support network-based migration, you can still migrate data, but the process becomes more manual and selective. In these cases, the goal shifts from a full system-style migration to file- and account-level data transfer, ensuring essential content is preserved even if the environment itself cannot be replicated automatically.
One common approach is to use an external storage device, such as a USB flash drive or external hard drive. You can copy user folders—Documents, Desktop, Pictures, Music, Movies, and Downloads—from the source Mac to the external drive and then move them onto the destination Mac. This method is reliable and broadly compatible, but it does not transfer applications, system settings, or user accounts automatically; those must be recreated on the new Mac.
You can also rely on cloud-based services such as iCloud Drive, email servers (IMAP), and third-party sync tools to move documents, photos, contacts, calendars, and some app data. This works well for smaller datasets or ongoing synchronization, but it is slower for large volumes and dependent on internet bandwidth and account limits.
The primary caveat with these methods is that they do not preserve the full macOS environment. Applications must be reinstalled, licenses reactivated, and preferences reconfigured manually. While less seamless than Migration Assistant, these approaches ensure that critical user data can still be transferred even when hardware or software limitations prevent direct Mac-to-Mac migration.
Migrating from a Windows PC to a Mac is possible, but the process focuses on transferring user data rather than replicating the Windows operating system or applications. Apple provides a tool called Windows Migration Assistant to guide the transfer. To begin, you need to prepare both computers: download and install the latest version of Windows Migration Assistant on the PC, ensure both computers are on the same network (wired or Wi-Fi), and connect them to power. It is also recommended to close unnecessary applications on both machines to avoid interruptions.
Next, open Migration Assistant on the Mac (Applications → Utilities) and select “From a Windows PC.” The Mac will then wait for the Windows PC to connect. On the PC, run Windows Migration Assistant and follow the prompts. The PC will detect the Mac on the same network, and a security code will appear on both computers to confirm the connection. Once verified, you can choose which data to migrate, including documents, photos, music, videos, email accounts from supported clients, contacts, calendars, and some browser settings. User account names can also be transferred, creating corresponding accounts on the Mac.
After selecting the data, the migration begins. Depending on the amount of data and network speed, the process can take anywhere from a few minutes to several hours. There are some important limitations to keep in mind. Applications from Windows do not migrate and will need Mac-compatible versions or alternatives. System settings, network configurations, and registry data are not transferred. Some file formats may require conversion to work properly on macOS. Migration speed over Wi-Fi can be slow for large transfers, so a wired Ethernet connection is generally faster and more reliable.
In summary, migrating from Windows to Mac preserves personal files, accounts, and basic data, but applications must be reinstalled and system settings configured manually on the Mac. The process ensures continuity of important content, but it is not a full system replication.
Migrating from Chrome, Android, Linux, or Unix to macOS can seem daunting at first, but with a structured approach it’s quite manageable. The process generally involves moving your data, adapting your applications, and adjusting your workflows to macOS.
If you are primarily coming from Chrome, the focus will be on your browser data: bookmarks, passwords, extensions, history, and open tabs. You can sign into Google on Safari or Chrome for Mac to have bookmarks, passwords, and history sync automatically. Optionally, you can export bookmarks from Chrome and import them into Safari. Passwords can be moved to iCloud Keychain for seamless macOS integration, or you can continue using Google Password Manager. Keep in mind that not all Chrome extensions have Safari equivalents, so you may need to find replacements in the Mac App Store or Safari Extensions Gallery.
For Android users, migrating contacts, calendars, photos, videos, files, and apps is the priority. Signing into Google accounts on macOS allows native integration with Mail, Calendar, and Contacts. Photos can be synced using Google Photos or exported and imported into the Photos app. Files can be transferred via USB, cloud storage, or web-based tools like Snapdrop. Messaging apps like WhatsApp have desktop versions, but SMS messages won’t sync with iMessage, so forwarding important texts may be necessary. Many Android apps may not have direct Mac equivalents, though web or alternative apps can often fill the gap.
For those moving from Linux or Unix, the main tasks are transferring home directories, config files, and finding software equivalents. Files can be moved using USB drives, network transfer, or cloud storage. Many Linux applications have Mac versions or equivalents, such as LibreOffice, GIMP, or VS Code, and macOS offers Homebrew for package management. While most Linux configuration files won’t transfer directly, you can manually migrate scripts, dotfiles, and Git configs. macOS’s Terminal is Unix-based, so many shell scripts will run with little or no modification.
When setting up a Mac, consider using Time Machine for regular backups and iCloud to sync contacts, calendars, Safari tabs, and your Desktop and Downloads folders. Keyboard shortcuts differ slightly from Linux and Windows, with Command taking the place of Ctrl and Option replacing Alt. Apple’s Migration Assistant can help import data from Windows PCs or external drives, while cloud services like Google Drive, Dropbox, or OneDrive facilitate cross-platform continuity.
With careful planning and the right tools, migrating from Chrome, Android, Linux, or Unix to macOS can be smooth and organized, allowing you to retain your data, replicate workflows, and adapt efficiently to the Mac environment.
Denver Mac Repair provides expert assistance for anyone looking to migrate data to or from a Mac, making the transition smooth, secure, and stress-free. Whether you’re moving from a Windows PC, Android device, Linux or Unix system, or even another Mac, their technicians can safely transfer files, contacts, calendars, emails, photos, and more, ensuring nothing gets lost in the process. They handle everything from exporting and importing browser data like bookmarks and passwords to setting up iCloud, Google accounts, or other cloud services so your apps and workflows stay consistent on your new Mac.
Beyond basic file transfers, Denver Mac Repair can also help with more complex migrations, such as moving large media libraries, configuring email clients, or ensuring compatibility of essential applications. They provide guidance on setting up Mac-specific features like Time Machine backups, iCloud sync, and optimized system preferences, so users feel confident and comfortable on their new system. With a focus on security and efficiency, Denver Mac Repair ensures that whether you’re upgrading, switching platforms, or consolidating devices, your transition to macOS is seamless and worry-free.