Virtualization and emulation on the Mac have evolved dramatically across Apple’s hardware transitions. In the early days of PowerPC Macs, users relied on emulators like Virtual PC to run Windows and x86 applications—a slow but groundbreaking approach that translated CPU instructions in software. When Apple shifted to Intel processors in 2006, virtualization entered a new era. Native Intel architecture meant Macs could run Windows and Linux at near-native speeds using tools like Parallels Desktop, VMware Fusion, and Apple’s own Boot Camp, which allowed direct dual-booting into Windows without emulation. This period made the Mac one of the most flexible systems for cross-platform computing.
The next major shift came in 2020 with Apple Silicon. ARM-based M1 and M2 chips ended support for Boot Camp and reintroduced the need for emulation—but with vastly improved techniques. Tools like UTM (built on QEMU) brought software-based emulation back for x86 operating systems, while Parallels and VMware transitioned to running ARM-native virtual machines of Windows and Linux at impressive performance levels. Today, macOS hosts a hybrid virtualization landscape: near-native ARM VMs for modern OSes, and efficient emulation layers for legacy x86 environments, continuing Apple’s long tradition of bridging architectures through software innovation.
On an Intel-based Mac, Boot Camp makes it possible to run Windows natively, giving you full access to the hardware with none of the performance compromises of virtualization. This means Windows runs directly on the Mac’s CPU and GPU, making it ideal for demanding tasks like engineering software, 3D modeling, data analysis, and other workloads that benefit from every bit of available processing power. It also allows gaming with true GPU acceleration, offering much better performance and compatibility than virtual machines—especially for titles that rely heavily on DirectX.
Boot Camp also enables the use of Windows-only software, enterprise tools, and specialized hardware that depends on non-virtualized drivers. With Apple’s full Boot Camp driver package, you can access Bluetooth, Wi-Fi, high-performance storage, and hardware features exactly as you would on a PC. Many Windows-only professional applications, industrial devices, and even firmware update utilities work flawlessly thanks to this native-level access.
Additionally, Boot Camp gives users the flexibility to maintain both macOS and Windows on the same machine, switching between them as needed. For students, developers, gamers, and professionals who rely on cross-platform compatibility, this dual-boot setup can dramatically extend the usefulness and lifespan of an Intel Mac—especially as macOS support ages but Windows continues to run smoothly on the hardware.
Boot Camp requires an Intel-based Mac, since Apple Silicon systems like the M1, M2, and M3 chips no longer support dual-booting Windows. Any Intel Mac running macOS Ventura or earlier can use Boot Camp Assistant, as Ventura is the final macOS version to include the tool. Earlier macOS releases such as Monterey, Big Sur, Catalina, Mojave, and others also support it. To install Windows, you’ll need a 64-bit Windows ISO—typically Windows 10, which is officially supported on most Intel Macs. Some Intel models can run Windows 11, though often unofficially.
You’ll also need sufficient storage, with at least 64 GB dedicated to the Windows partition, though Apple recommends 128 GB or more to handle updates and applications comfortably. Once Windows is installed, Boot Camp requires Apple’s Windows support drivers to enable proper graphics performance, Wi-Fi, Bluetooth, audio, Thunderbolt, USB, and trackpad gestures. Boot Camp Assistant handles creating and installing these drivers automatically. With those requirements met, an Intel Mac can run Windows natively and take full advantage of its hardware, offering a seamless dual-boot experience.
To use Boot Camp, start by opening Boot Camp Assistant, which is located in the Utilities folder inside Applications. The assistant guides you through creating a partition on your Mac’s internal drive for Windows. You’ll need a Windows 10 (or supported) ISO file ready, as Boot Camp will use it to install the operating system. During the partitioning step, you can decide how much space to allocate to Windows—Apple recommends at least 128 GB for a smooth experience. Once the partition is created, Boot Camp will copy the Windows installer onto the partition and restart your Mac to begin the Windows installation process.
After your Mac restarts, the Windows installer will launch. Follow the prompts as you would on a regular PC, selecting the Boot Camp partition when asked where to install Windows. Once installation is complete, your Mac will boot into Windows for the first time. At this point, Boot Camp drivers will automatically install, enabling full hardware support for graphics, Wi-Fi, Bluetooth, audio, trackpad gestures, and keyboard functions. From then on, you can switch between macOS and Windows by holding the Option (⌥) key at startup, selecting the operating system you want to use. This process gives Intel Macs a fully native Windows environment with full access to hardware performance.
No, Boot Camp is not available on Apple Silicon Macs. Unlike Intel-based Macs, M1, M2, and M3 Macs cannot dual-boot Windows or other operating systems natively because Boot Camp relies on Intel architecture. Apple Silicon uses an entirely different ARM-based CPU, so the traditional Boot Camp method of partitioning the drive and running Windows natively isn’t compatible.

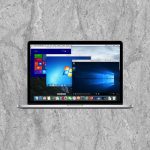
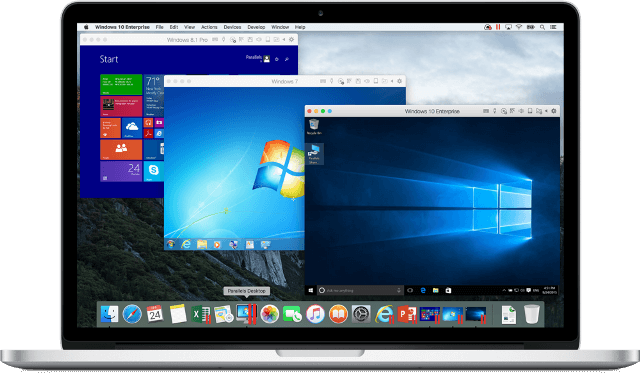
On an Intel Mac, Parallels Desktop provides a flexible virtualization environment that allows you to run Windows, Linux, or even other versions of macOS alongside macOS without rebooting. Unlike Boot Camp, which requires dual-booting, Parallels runs operating systems in a virtual machine (VM), meaning Windows and macOS can operate simultaneously, and you can switch between them seamlessly. This is particularly useful for users who need access to Windows-only apps while continuing work in macOS, whether for professional software, enterprise tools, or gaming.
With Parallels, you can run almost any Windows software, including productivity suites, design applications, development environments, and enterprise solutions, all with near-native performance on Intel Macs. The VM can integrate with macOS features, allowing file sharing between operating systems, copy-paste across apps, and even running Windows applications directly from the Mac Dock. Parallels also supports snapshots and backups, making it easy to experiment with software or test configurations without risk. Additionally, you can allocate CPU cores, memory, and storage to the virtual machine to balance performance between macOS and the VM. Overall, Parallels turns an Intel Mac into a versatile dual-environment system, combining the flexibility of Windows and Linux with the native Mac experience.
To run Parallels Desktop on an Intel Mac, you need an Intel-based machine with sufficient memory and storage. While the minimum requirement is 4 GB of RAM, 8 GB or more is recommended for smooth performance, especially if you plan to run multiple applications simultaneously. You also need enough free storage space to accommodate both macOS and the virtual machine, with at least 16 GB for the VM itself—though larger virtual machines with apps and data may require 64–128 GB or more.
Parallels Desktop supports macOS 10.15 Catalina and later, including Big Sur, Monterey, and Ventura, so keeping your macOS up to date helps ensure compatibility. You’ll also need a valid license and installation media, such as an ISO file, for the guest operating system you plan to run. On Intel Macs, this can include 64-bit versions of Windows, Linux, or older macOS versions. Administrator privileges are required to install Parallels, and an internet connection is recommended for updates, virtual machine tools, and guest OS activation. Additionally, you can connect USB devices, external drives, and network resources directly to the VM if needed, giving you full flexibility within your virtualized environment.
On an Apple Silicon Mac—M1, M2, or M3—Parallels Desktop allows you to run virtual machines, but with some differences compared to Intel Macs due to the ARM architecture. You can run ARM-native operating systems such as Windows 11 for ARM, Linux distributions compiled for ARM, and even other ARM-based versions of macOS. This enables access to Windows-only applications, enterprise software, development tools, and Linux utilities while staying inside macOS, all without needing to reboot.
Parallels on Apple Silicon also provides integration features similar to Intel Macs: you can share files, folders, and copy-paste between macOS and the virtual machine, run Windows apps directly from the Mac Dock, and allocate CPU cores, memory, and storage to the virtual machine for optimal performance. For legacy x86 Windows applications, Parallels relies on Windows 11’s built-in x86 emulation, allowing many 32-bit and 64-bit apps to run within the ARM-based VM, though performance may be slightly lower than native Intel Windows. Overall, Parallels turns an Apple Silicon Mac into a flexible, cross-platform workstation, combining the efficiency of ARM with the ability to run a broad range of software.
To run Parallels Desktop on an Apple Silicon Mac, you need an M1, M2, M3, or later model with sufficient memory and storage. While 4 GB of RAM is the minimum requirement, 8 GB or more is recommended for smooth performance, especially when running resource-intensive applications. You’ll also need enough free storage to accommodate both macOS and the virtual machine, with at least 16 GB for the VM itself and 64 GB or more recommended for larger Windows or Linux installations.
Parallels Desktop on Apple Silicon requires macOS 11 Big Sur or later, including Monterey, Ventura, and Sonoma. Keeping macOS updated helps ensure compatibility with the latest Parallels features and ARM-based virtual machines. You’ll also need a valid license and installation media for an ARM-compatible operating system, such as Windows 11 for ARM, ARM-based Linux distributions, or other ARM versions of macOS. Windows 11 for ARM includes built-in x86 emulation, allowing many legacy Windows applications to run, though some software may not be fully compatible.
Administrator privileges are required to install Parallels, and an internet connection is recommended for downloading updates, Parallels tools, and activating the guest OS. Additionally, USB devices, external drives, and network resources can be connected directly to the virtual machine, giving Apple Silicon Macs full flexibility for cross-platform work while staying within macOS.
Using Parallels Desktop on a Mac is straightforward and works similarly on both Intel and Apple Silicon machines, though the guest OS requirements differ. To get started, first download and install Parallels Desktop from the official website. Once installed, open the app, and you’ll be guided through creating a new virtual machine (VM). You can either use an existing installation ISO or download a ready-to-use image directly through Parallels, such as Windows 11 for ARM on Apple Silicon or Windows 10/11 on Intel Macs.
During setup, Parallels will ask you how much CPU, RAM, and storage to allocate to the virtual machine. You can adjust these based on your Mac’s resources and the needs of the guest operating system. Once configured, Parallels will install the OS, and after the first boot, it will automatically install Parallels Tools, a set of drivers that enable seamless integration with macOS. With Parallels Tools, you can share files and folders between macOS and the VM, copy and paste between environments, run Windows apps directly from the Mac Dock, and use peripherals like USB drives or external monitors.
After setup, you can run the virtual machine alongside macOS, switch between full-screen or windowed modes, and create snapshots to save the state of the VM at any time. This allows experimentation or testing software without risk. To optimize performance, you can adjust the VM settings anytime in Parallels Desktop, balancing system resources between macOS and the virtual machine for the best experience.
On an Intel Mac, VMware Fusion provides powerful virtualization capabilities, allowing you to run multiple operating systems—such as Windows, Linux, or older macOS versions—alongside macOS without rebooting. Unlike Boot Camp, which requires dual-booting, VMware runs virtual machines (VMs) inside macOS, enabling seamless multitasking between your Mac apps and the guest OS. This is particularly useful for developers, IT professionals, and power users who need to test software across platforms, run enterprise applications, or use Windows- or Linux-exclusive tools.
With VMware Fusion, you can run almost any 64-bit operating system compatible with Intel Macs. The software provides near-native performance for many applications, including productivity tools, development environments, and graphics-intensive programs. Fusion also supports integration with macOS features: you can drag and drop files between macOS and the VM, copy and paste across environments, run guest OS apps directly from the Mac Dock, and connect peripherals like USB drives or external monitors. Additional features like snapshots, cloning, and network configuration make it ideal for testing software, experimenting with different setups, or maintaining isolated environments for development and enterprise work.
Essentially, VMware Fusion turns an Intel Mac into a versatile, cross-platform workstation, letting you run multiple operating systems side by side while maintaining macOS as your primary environment.
To run VMware Fusion on an Intel Mac, you need an Intel-based machine with sufficient memory and storage. While 4 GB of RAM is the minimum requirement, 8 GB or more is recommended for smooth performance, especially when running multiple applications or heavy virtual machines. Each VM also requires storage, typically 16–64 GB or more depending on the guest operating system and installed software, so having ample free disk space is important.
VMware Fusion supports macOS 10.15 Catalina and later, including Big Sur, Monterey, and Ventura. Keeping macOS up to date ensures compatibility with the latest version of Fusion and any security improvements. The software can run almost any 64-bit operating system compatible with Intel Macs, including Windows 10, Windows 11 (x64), Linux distributions, and older versions of macOS. You will need a valid license and installation media, such as an ISO file, for each guest operating system.
Administrator privileges are required to install VMware Fusion, and an internet connection is recommended for downloading updates, VMware Tools (which provide integration and drivers for the guest OS), and activating the guest operating system. Additionally, USB devices, external drives, and network resources can be connected directly to the virtual machine, providing full hardware integration and making VMware Fusion a flexible solution for running multiple operating systems side by side with macOS.
On an Apple Silicon Mac, VMware Fusion allows you to run virtual machines, but only with ARM-compatible operating systems. This includes Windows 11 for ARM, ARM-based Linux distributions, and other ARM versions of macOS. Within these virtual machines, you can run ARM-native applications, enterprise software, development tools, and Linux utilities while staying inside macOS, all without rebooting. VMware Fusion provides a full virtualized environment, giving you flexibility for testing, software development, and cross-platform workflows.
Fusion also integrates closely with macOS. You can share files and folders between the host and the virtual machine, copy and paste across environments, run guest OS apps directly from the Mac Dock, and connect peripherals like USB drives or external monitors. For Windows users, Fusion relies on Windows 11 ARM’s built-in x86 emulation to run many legacy Intel applications, though performance may be slightly lower than native Intel Macs. Overall, VMware Fusion on Apple Silicon turns your Mac into a versatile ARM-based workstation, letting you run multiple operating systems side by side while retaining macOS as the primary environment.
To run VMware Fusion on an Apple Silicon Mac, you need an M1, M2, M3, or later model with sufficient memory and storage. While light workloads may run with the minimum memory, 8 GB of RAM or more is recommended for smooth performance, especially when running resource-intensive applications. Each virtual machine also requires storage, with at least 16 GB needed for the VM itself and 64 GB or more recommended for larger installations and software.
VMware Fusion on Apple Silicon requires macOS 11 Big Sur or later, including Monterey, Ventura, and Sonoma. Keeping macOS updated ensures compatibility with the latest Fusion features and ARM-based virtual machines. Only ARM-compatible operating systems can run on Apple Silicon Macs, such as Windows 11 for ARM, ARM-based Linux distributions, and other ARM versions of macOS. Windows 11 for ARM includes built-in x86 emulation, which allows many legacy Windows applications to run, though not all x86 software is fully supported.
Administrator privileges are required to install VMware Fusion, and an internet connection is recommended for downloading updates, VMware Tools (which provide drivers and integration for the guest OS), and activating the guest operating system. Additionally, USB devices, external drives, and network resources can be connected directly to the virtual machine, providing full hardware integration and making VMware Fusion a flexible solution for running multiple operating systems alongside macOS on Apple Silicon Macs.
Using VMware Fusion on a Mac is straightforward and works similarly on both Intel and Apple Silicon models, though the guest OS requirements differ. To get started, first download and install VMware Fusion from the official VMware website. Once installed, open the application and create a new virtual machine (VM). You can either use an existing installation ISO or image file for your guest operating system, such as Windows, Linux, or macOS. On Apple Silicon Macs, make sure the OS is ARM-compatible, while on Intel Macs, any 64-bit OS can be used.
During setup, VMware will prompt you to allocate CPU cores, RAM, and storage to the virtual machine. You can adjust these resources based on your Mac’s hardware and the needs of the guest OS. Once the OS is installed, VMware Tools—drivers and integration software—will automatically install, enabling features such as drag-and-drop file sharing between macOS and the VM, copy-paste functionality, and improved graphics and peripheral support.
After setup, you can run the VM alongside macOS, switch between windowed or full-screen modes, and create snapshots to save the VM’s state at any time. Snapshots are useful for testing software, experimenting with configurations, or rolling back changes without affecting the host macOS environment. VMware Fusion also allows you to connect USB devices, external drives, and network resources directly to the VM, providing a fully integrated, flexible cross-platform workstation.
Virtualization and emulation on Macs extend far beyond the well-known options of Boot Camp, Parallels, and VMware Fusion, offering a variety of tools to run different operating systems or preserve legacy software. On Intel Macs, users can take advantage of solutions like VirtualBox, an open-source virtualization platform that supports a wide range of guest operating systems including Windows, Linux, and older macOS versions, making it popular for testing, development, and educational purposes. For those looking to run older PowerPC Macintosh software, SheepShaveremulates classic Mac OS 7.5.2 through 9.0.4, keeping legacy applications accessible on modern hardware. Additionally, Intel users can run DOS programs through DOSBox or experiment with multiple architectures using QEMU, a flexible but more technical open-source emulator.
On Apple Silicon Macs, the landscape shifts due to the ARM-based architecture. Traditional Intel virtualization and emulation solutions like Boot Camp and VirtualBox are no longer compatible, but ARM-native tools have emerged. Parallels Desktop and VMware Fusion for ARM allow users to run Windows 11 for ARM, Linux distributions, or other ARM-based operating systems at near-native speeds, while also providing integration features like shared files, drag-and-drop functionality, and copy-paste between macOS and the virtual machine. For emulating x86 or legacy systems, UTM—built on QEMU—offers broad CPU architecture support, allowing Apple Silicon Macs to run older operating systems in software-emulated environments. Other specialized tools, such as CrossOver, enable Windows applications to run directly on macOS without a full Windows installation, and gaming-focused emulators like RetroArch provide console emulation across Intel and Apple Silicon Macs. Together, these solutions create a diverse virtualization and emulation ecosystem, allowing Macs to run software from multiple platforms, preserve legacy applications, and support cross-platform development, regardless of the underlying hardware.
The difference between virtualization and emulation comes down to how the software interacts with the hardware and the resulting performance.
Virtualization creates a virtual environment that allows an operating system to run on the same CPU architecture as the host machine. The guest OS shares the host’s hardware directly, often with near-native performance. For example, running Windows on an Intel Mac using Parallels or VMware Fusion is virtualization because both macOS and Windows are running on the same x86 architecture. Virtualization works best when the guest and host architectures are the same, and it allows efficient use of CPU, memory, and other resources, with minimal overhead.
Emulation, on the other hand, mimics hardware or a CPU architecture that differs from the host. The emulator translates instructions from one architecture to another, which allows software designed for one type of hardware to run on a completely different system. For example, using UTM to run x86 Windows on an Apple Silicon Mac or SheepShaver to run PowerPC Mac OS on an Intel Mac is emulation because the host and guest architectures are different. Emulation introduces more overhead, so performance is generally slower than virtualization, but it enables cross-architecture compatibility that virtualization cannot.
In short, virtualization is fast and efficient for same-architecture systems, while emulation provides flexibility to run software across different hardware platforms at the cost of speed.